toothpick bridge design step by step
Draw two full scale drawings of the bridge design on the graph paper. You can create your own template with different shapes if you like.

Toothpick Bridge Project 7 Steps Instructables
Draw a picture of your bridge on the back.
. Using toothpicks secure the pieces. Step-by-Step Instructions Sketch the model of your bridge on the graph paper. Your bridge should be symmetrical as this will result in the best possible weight distribution and lessen the stress placed on any particular joint.
Sponsored by local engineering. Place one of these shorter pieces between them. Building a toothpick bridge in schools is often found in physics or math.
Build a Support Structure. Up to 24 cash back 1. February 25 2022.
To test the strength of a toothpick roll it between your thumb and forefingers while applying pressure. Since introducing a page for this endeavor I have seen emails and questions from all over the world. Obviously you will need toothpicks and they have to be good flat toothpicks to ensure your bridge is strong.
Set up your bridge support structures such as two stacks of books spaced apart. If you only use a single toothpick for each support beam it wont. Start by building pyramids with four marshmallows at the base and one at the top.
After 12 hours of covering the Bridge let it dry. Start with spacing the books about 4 inches apart 3. This page will introduce the pages about toothpick bridge construction.
This will help to alleviate many of the compression forces during the testing period. Building a toothpick bridge for a competition. If possible you should construct an underhang for your bridge.
With a toothpick wrap around a large chunk of tacky craft glue. Take seven toothpicks and link the two sides of the bridge so that they bridge between marshmallows and marshmallowes. Spread wax paper over the sketch and trace out the drawing on.
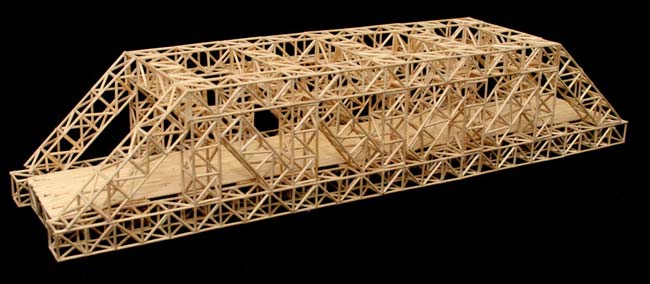
You will not need a lot of materials and they are all super cheap and easy to find. White board marker or highlighter. The continually subdivided reinforcement pieces divide the weight more evenly and that allows for a more stable bridge.
He discusses how to design and build a toothpick bridge and also has good photos. As a bridge place toothpicks between the two pieces. It is no wonder that the response has been positive because it is not an easy assignment and my first page told step-by-step how I went about solving the problem.
Toothpick Bridge Building Lab. Any kind of toothpicks will do I got mine from walmart. And though I have thought much about it I have not attempted to build one yet.
In order to avoid splitting the toothpicks threads ought to be stretched over both of them. The first 4 steps are to create a template for design. A light sprinkle of water should dry the bridge for 12 hours.
December 11 2019 January 16 2020 Toothpick Bridge Building Contest Sarasota. Any toothpick that bends or breaks easily should be. Sketch the bridge on to the paper with the pencil.
Up to 24 cash back 1. Make sure toothpicks are between the two parts of the bridge so that they wont be too wet. Insert the toothpicks into the gumdrops to create a bridge structure to.
In the meantime roll out another dabbing of glue and apply it to the wrap joint so the thread is covered. Design a bridge using a style of bridge you think would be the best to span over a distance. Generate ideas and design solutions to solve a problem using sketches drawings and notes.
The continually subdivided reinforcement pieces divide. They work in tandem like a regular truss with struts that connect the upper arches to the lower archs. Toothpick bridge step 1 empowerment activity.
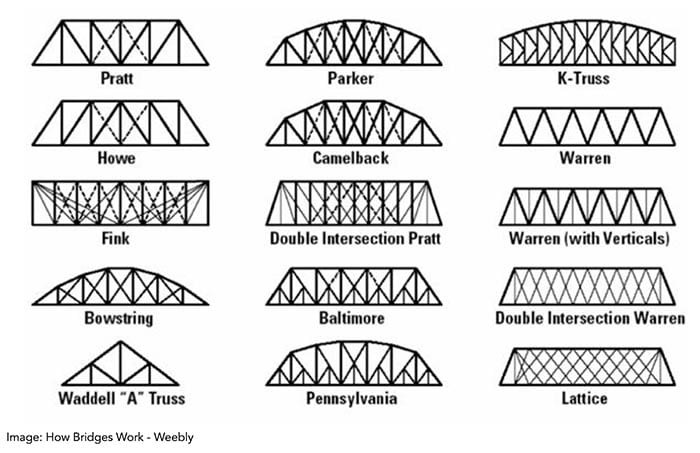
They need to be glued. First thing you would have to do is figure out which bridge design you want to go with for the main part. Toothpick Bridge Flyer 2020.
Put the toothpicks over the pencil marks on the wax paper and glue them. Within this span there will be a second side which runs parallel to the first. Also make sure to use a group of toothpicks stuck togeteher.
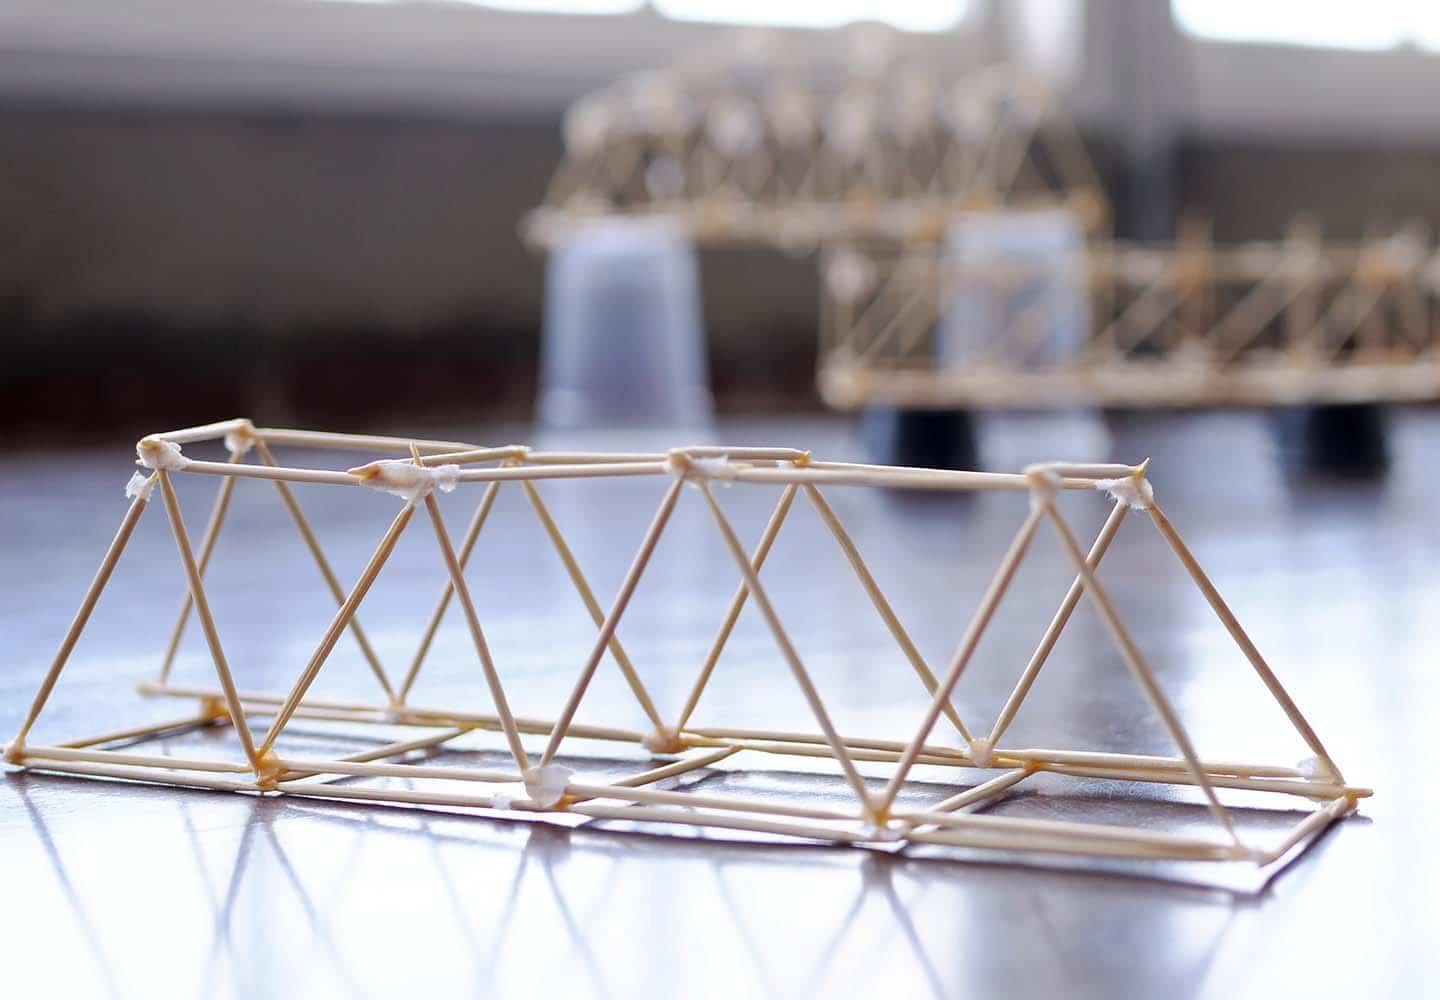
Constructing the Sides of the Bridge. Toothpick Bridge Step 1. There are many possible designs for a bridge but this kind of bridge is one of the most sturdy.
You should be left with a long trapezoidal shape. Estimate make and use measurements in a STEM project. Draw two identical models you will need the second one.
Manage time and resources in a STEM project. One of the tips to build toothpick bridges is to have good materials. Identify the components of a bridge system members joints load deck footing truss etc 5.
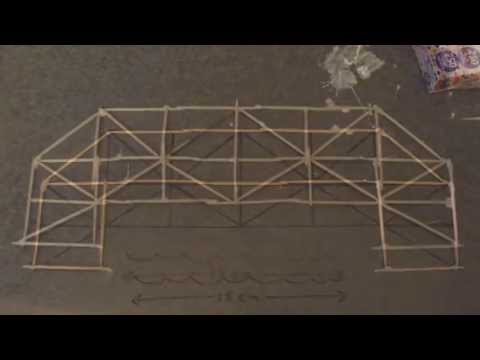
Grab 3 sheets of the Template line them up as shown and use the tape to stick them together. How Do You Make A Simple Toothpick Bridge. The design relies on the four catenary arches to transfer the weight of a load to the four feet on each side of the bridge.
Spread wax paper over the sketch and trace out the drawing on the wax paper. This cosh function is the hyperbolic cosine. By anyones standard its the classic lab in physics.
How to Build a Toothpick Bridge A Step-by-Step Guide. My teacher made it a requirement. The formula for a catenary arch is ycosh x.
Toothpick Bridge Step 1. One toothpick-length from each bridge should match the length of the bridge pieces parallel to them. The Toothpick Bridge-Design The design relies on the four catenary arches to transfer the weight of a load to the four feet on each side of the bridge.
Use 12 length strands of spaghetti to connect the base and full length strands to connect the base to the marshmallow at the top. Repeat for the other side of the beams. Toothpick Bridge Project Step 1.
Tape two pieces of graph paper together. The Toothpick Bridge Challenge is a fun annual event for students in the Sarasota Manatee County area. Using step 1 duplicate the triangle-making process to turn it into a triangle that is similar to the one you already created.
Its recommended to give a square foundation to your model because. Figure out what bridge design you want to build refer to the image below. The template provided in the last page is optional.
Toothpick to the parallelly parallel bridge pieces. Start to sketch out your. Simple elegant and beautifully illustrated this lab is unparalleled in the open-ended creativity that students can employ.
And remember always push the spaghetti deep into the marshmallow it provides more grip B. Identify the components of a bridge system members joints load deck footing truss etc 5. Connect the beams by placing a toothpick at the very end of the long beam and diagonally lean it onto the short beam and glue it in place using a couple drops of glue.
Here is a father whos son made a toothpick bridge. Many people come to GarrettsBridges looking for advice on building a toothpick bridge.
Building A Toothpick Bridge Youtube
Toothpick Bridge Career Girls
How To Build A Toothpick Bridge Science Project Ideas

What S The Key To Building A Strong Toothpick Bridge Quora

How Bridges Are Built Jembatan Teknik Pengetahuan

57 Bridge Design Ideas Bridge Design Bridge Spaghetti Bridge
Toothpick Bridge Career Girls
Mrs Orton Gifted Specialist Bridge Building Info
Belum ada Komentar untuk "toothpick bridge design step by step"
Posting Komentar